Photoshop CS6 has some great features, one of them is the new timeline for basic animations and this time Photoshop gets a little bit of the After Effects taste.
In this tutorial I’ll show you a simple animation using the new timeline and some light effect tricks. The whole process is super simple and won’t take you more than 20 minutes.
NOTE: TRY EITHER OF THESE WAYS TO GET THE FONT TO WORK:
Go to the sample file and right click on a layer and choose Copy Layer Style. Next, go onto your own and select your layer or create a new layer and right click and select paste layer style.
OR
- – type the letter A
- – double click on the layer and in the options go to blending options on the top left.
- – in blending options make the fill opacity 0%
- – then go to stroke and make a stroke the size of the font in the tutorial
- – exit the menus and then right click on the layer and convert it to a smart object
Step 1
Open Photoshop CS6 and create a new document. Fill the background layer with any color, then go toLayer>Layer>Styles>Gradient Overlay. Use Radial for the Style and for the colors use black and #36557f for the center. Add a black stop at 45%. Keep the blend mode on Normal and the angle at 90 degrees.
Step 2
Add a text you want to use for the light effect. I am using the letter A of Abduzeedo using a stencil font called Major Snafu. You can download it at http://www.dafont.com/major-snafu.font?text=a+A

Step 3
To create the letter outline, convert the letter to a shape by right clicking on the layer and selecting “Convert to Shape.” Then, click on your shape tool on the left side of the screen. In the options bar, Remove the fill and add a dark grey stroke (#363636). Make the stroke 10 pt. Open the stroke options menu (right next to the stroke thickness) . Set the stroke to align to the center of the path and make the corners and caps rounded.
Step 4
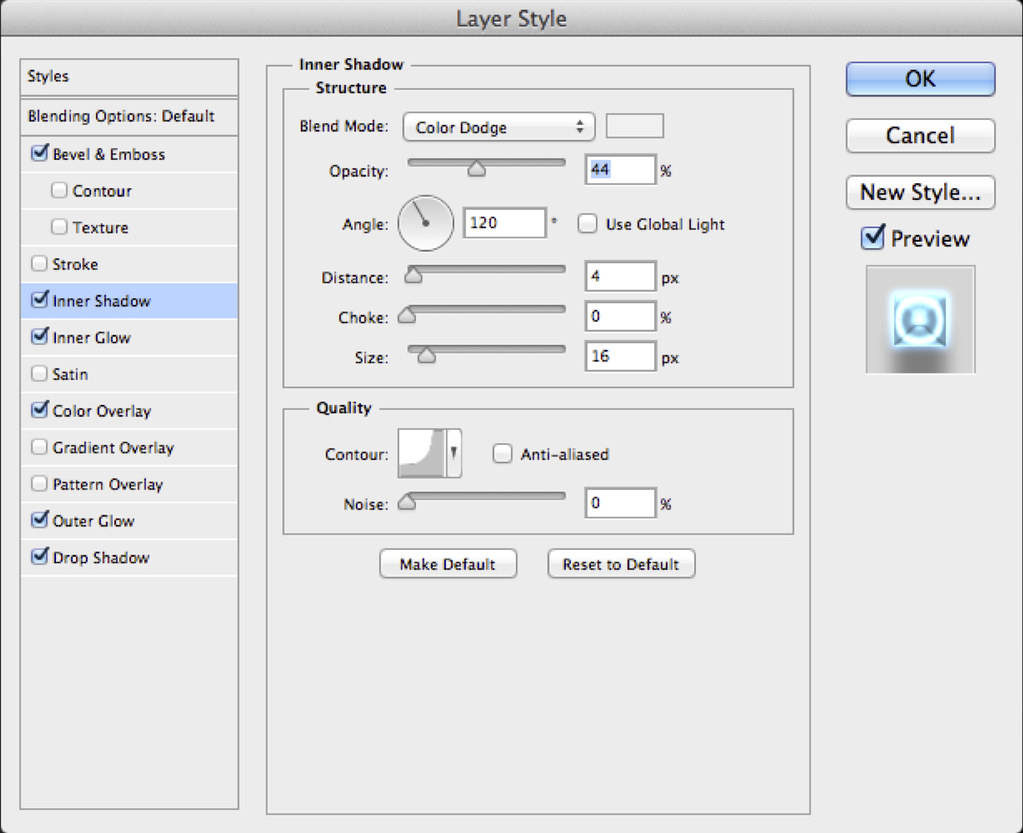
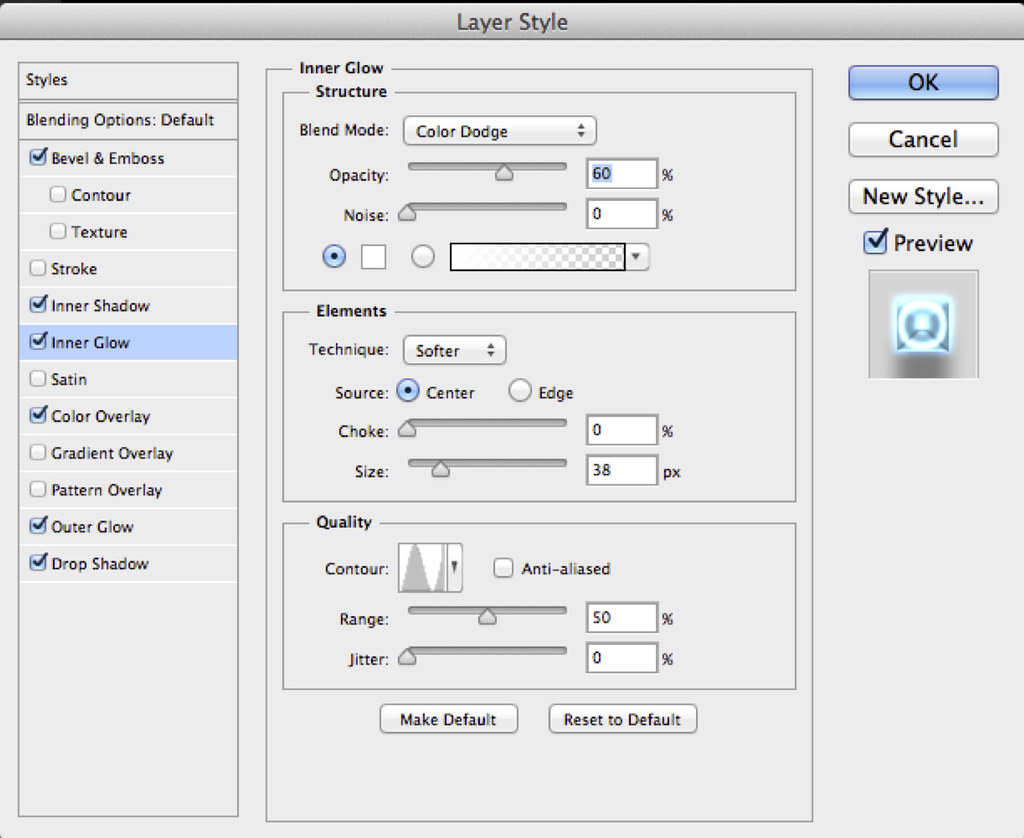
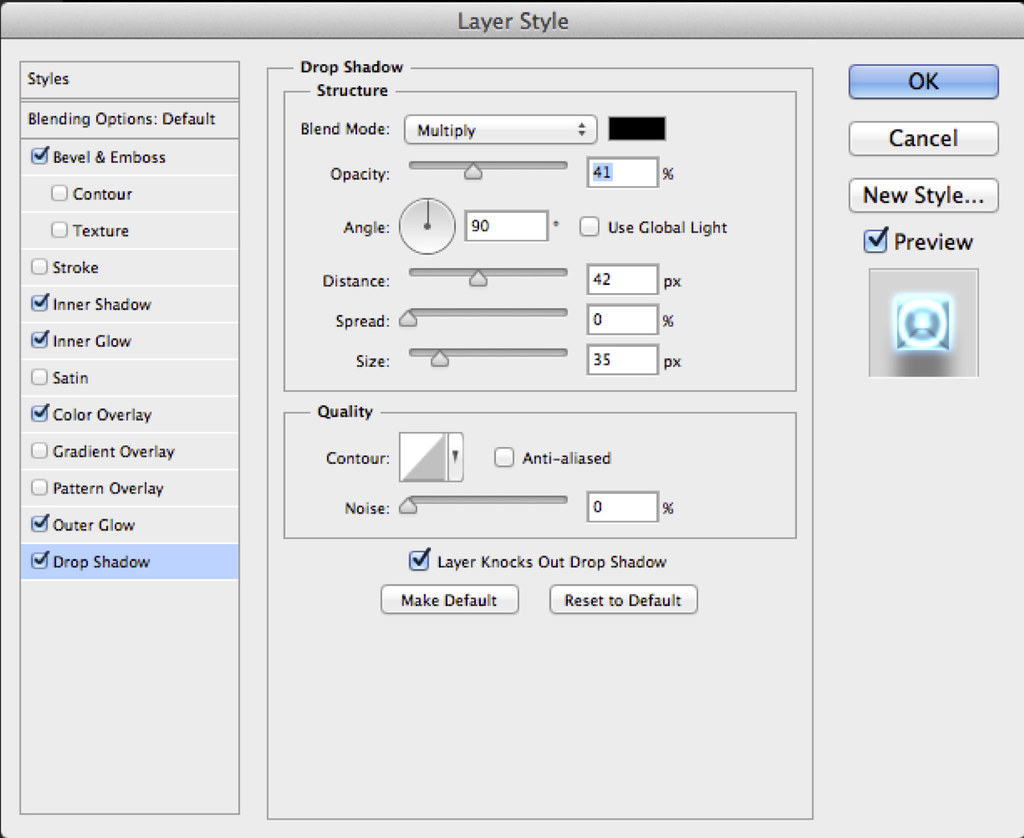
To create the light effect we will use Layer Styles. Just follow the instructions below for Bevel & Emboss, Inner Shadow, Inner Glow, Color Overlay, Outer Glow and Drop Shadow.
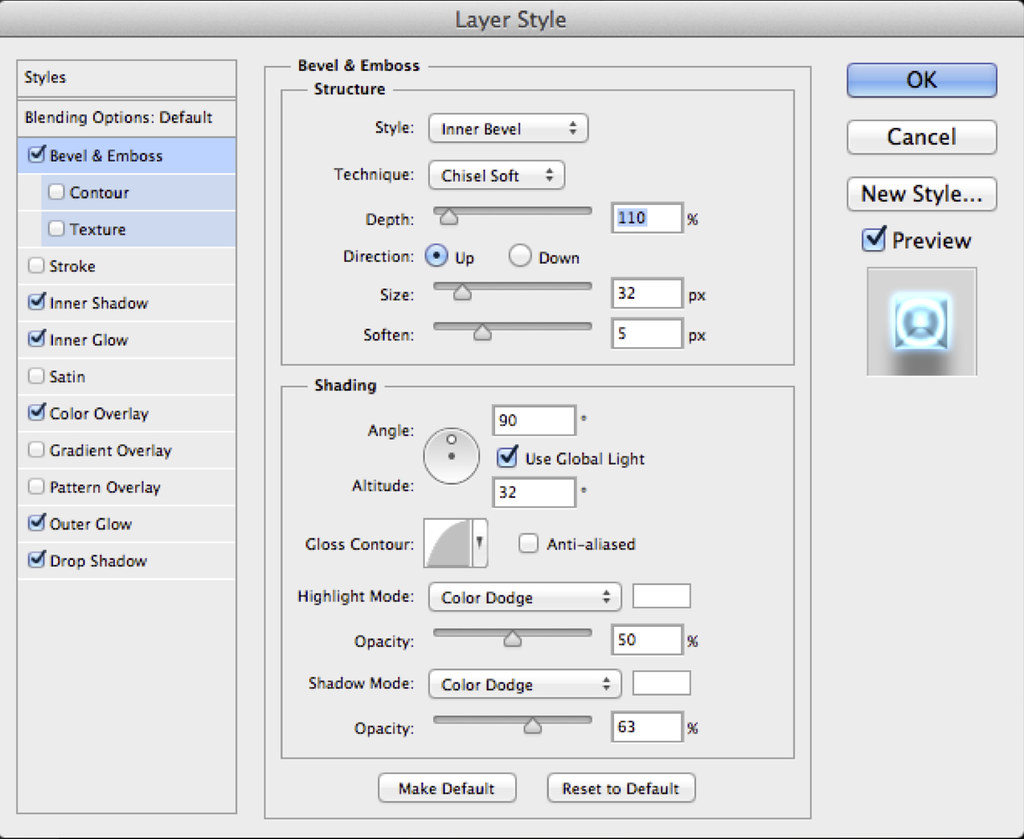
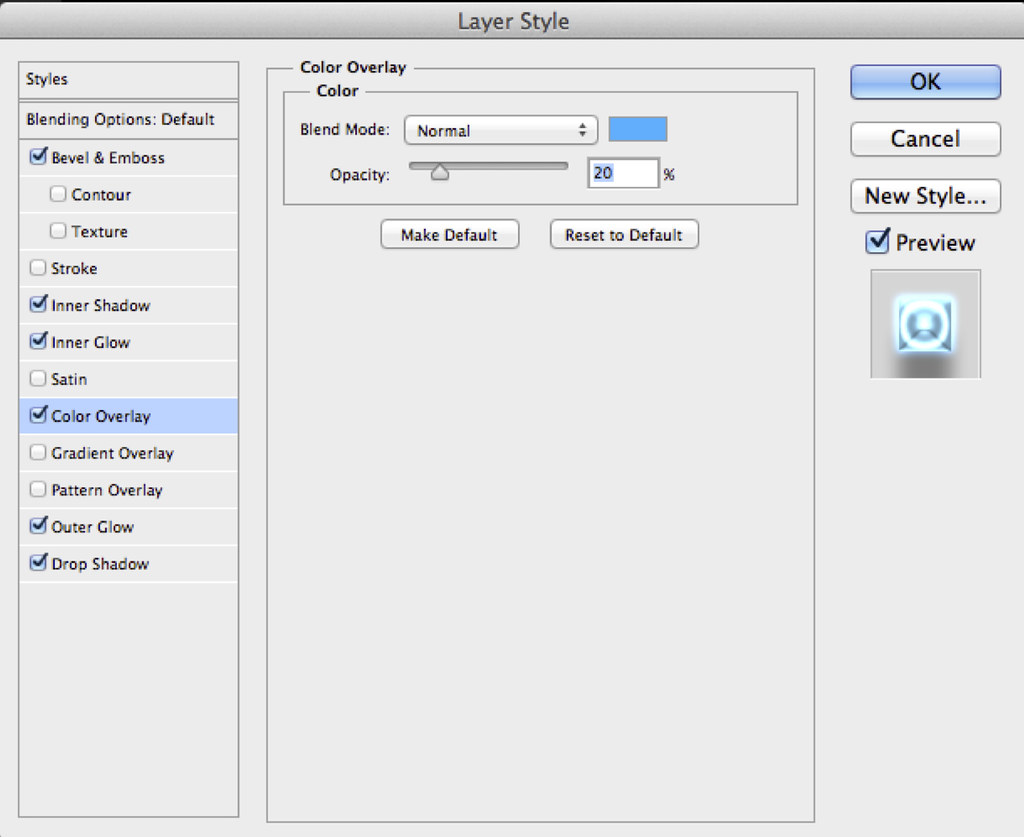
The color for the overlay is #00aeff

The color for the outer glow is #15aaff
Step 5
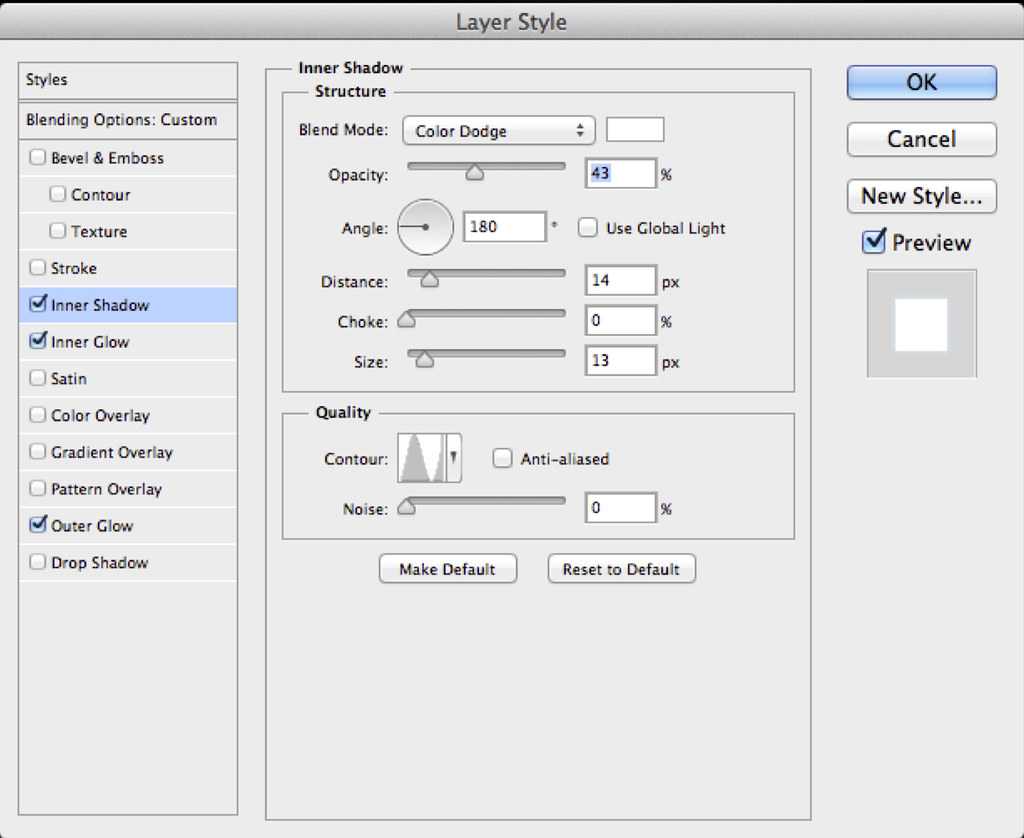
Duplicate the layer and disable the layer styles. Use Inner Shadow, Inner Glow and Outer Glow using the settings below.
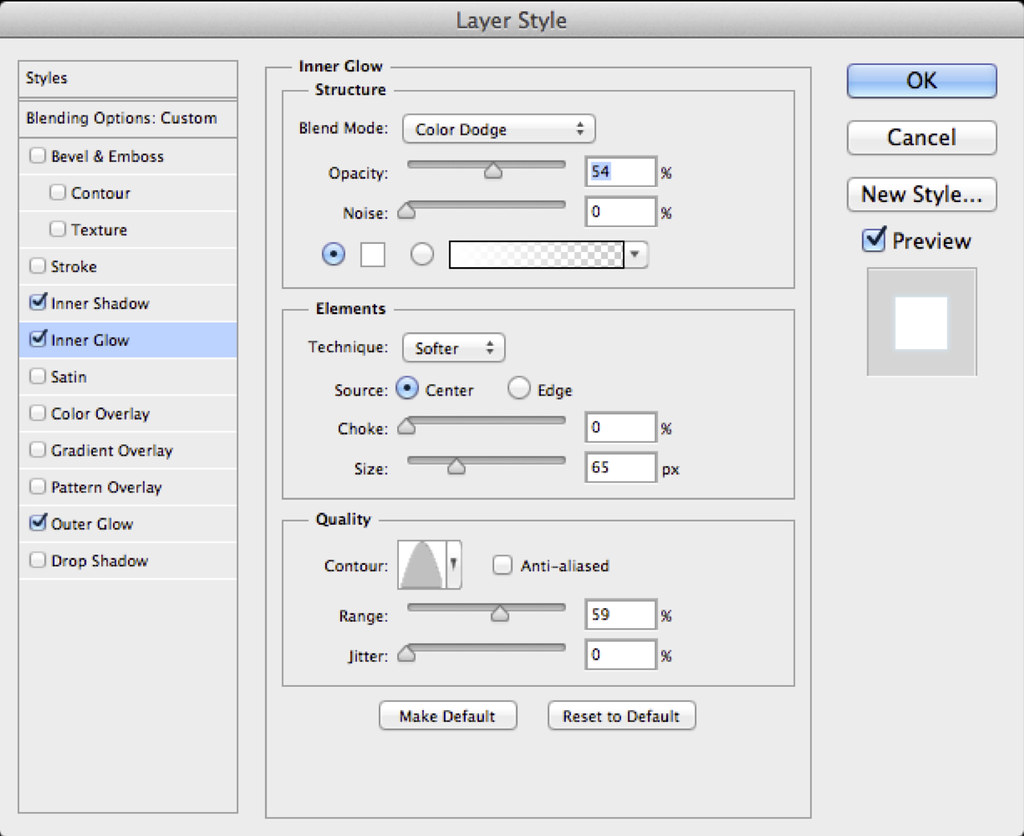
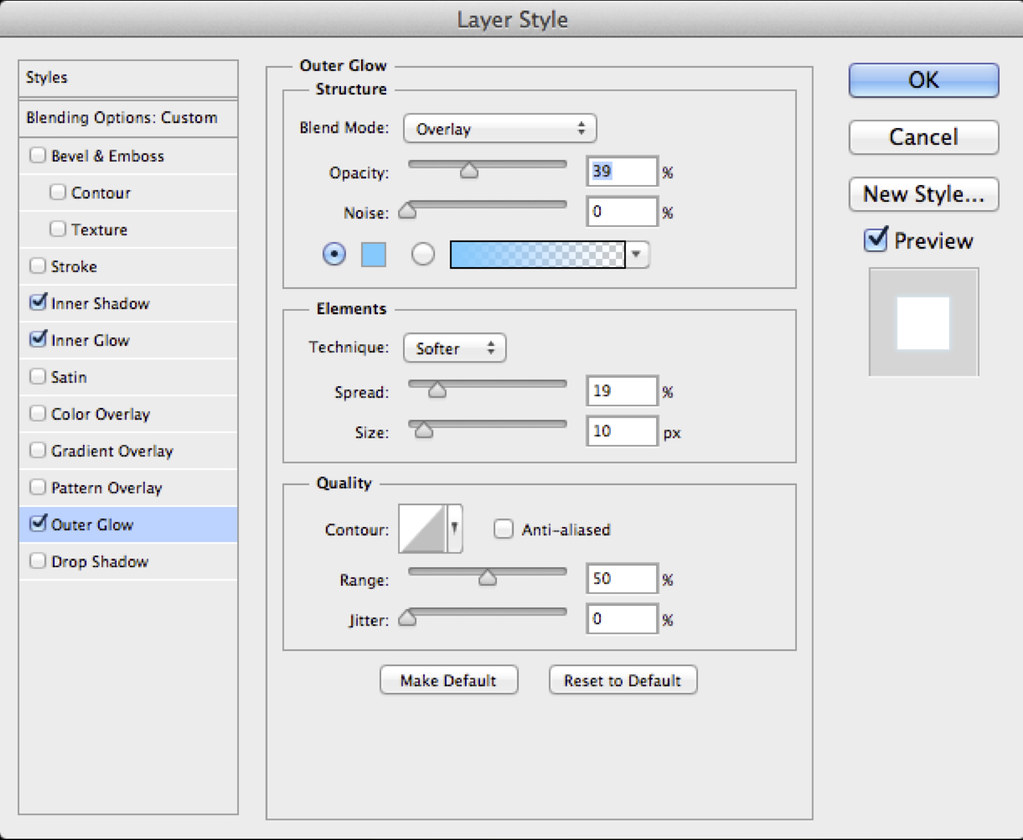
The color for the outer glow is #5acbff
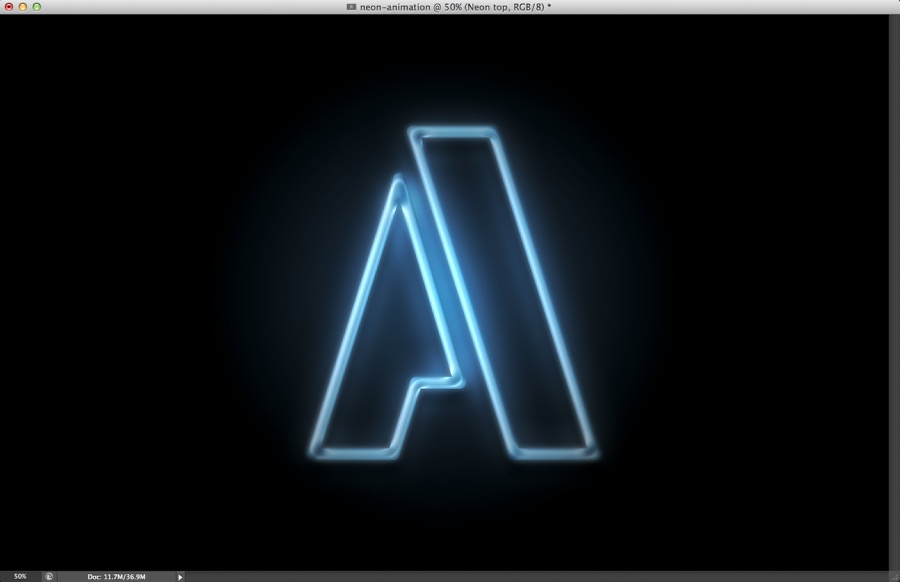
Step 6
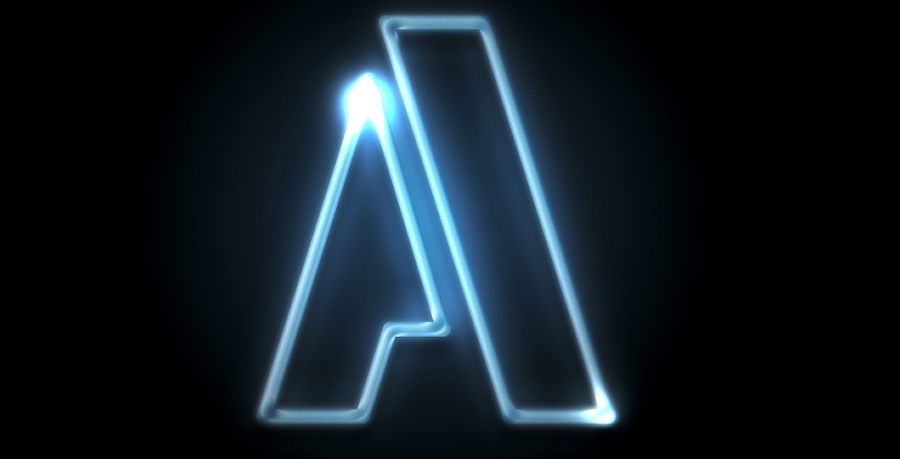
This is the results you will get after the layer styles. It’s very similar with another tutorial I wrote a few years ago showing how to create a neon effect in Photoshop. Again the idea of this tutorial is to play with the timeline feature. That’s why I will cover the first steps quickly.
Step 7
Add 2 layers on top of the other layers and name them right and left. After that group these 2 layers in a folder. Change the folder’s Blend Mode to Color Dodge. With the Brush Tool (B), select “Soft Round Pressure Size” and set the size to 30px, paint with white on top of the right part of the letter A. Select the left layer and paint another spot of light on top of the left part. Use the image below for reference.
Step 8
Go to Window>Timeline. You will see the timeline panel. The first thing you will notice is that all layers are in the timeline. Select the 2 layers in the folder. Expand them in the tree and make sure that the timeline is in the 0 frame. Click on the Position option to create a keyframe.
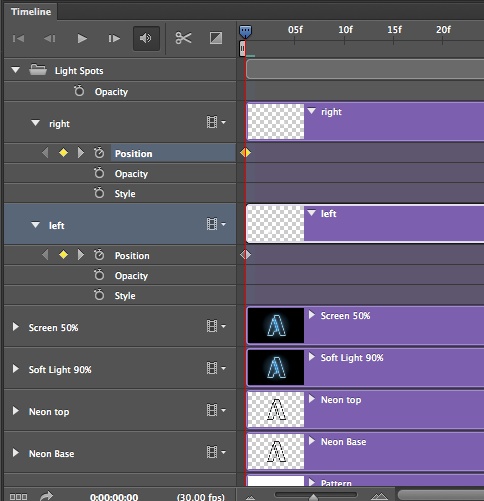
Step 9
Move the timeline to the position 1:00 and then move the layers in the composition where you want them to move to.
Step 10
This would be the second position of the light spots.
Step 11
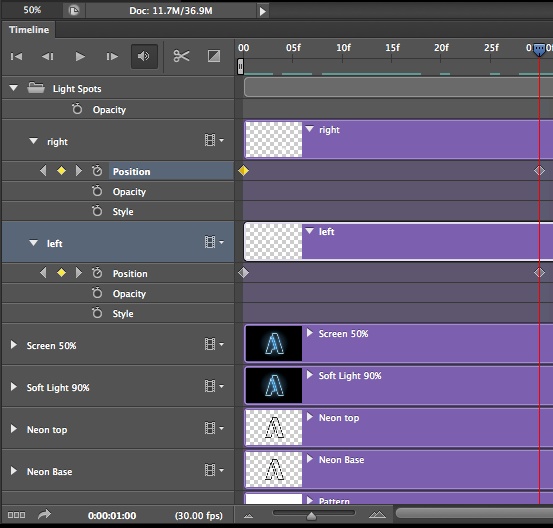
Move the timeline again and after that move the layers to create new keyframes.

Step 12
Keep moving them to create the motion. Always remember to put a keyframe when your light (your brush mark) reaches a corner. Otherwise, the motion will cut across the outline instead of following the edge.
Step 13
To make the last point and make the animation loop perfectly, create the last keyframe for the right layer. Then, right click on the first keyframe and select copy. Right click on the last keyframe (the one you just made) and click paste. This will ensure that your light source (your brush mark) will be at the same exact point at the beginning and end of your gif.
Timeline
This is something like how your timeline will look. Note the keyframes for the points where the animation changes position.

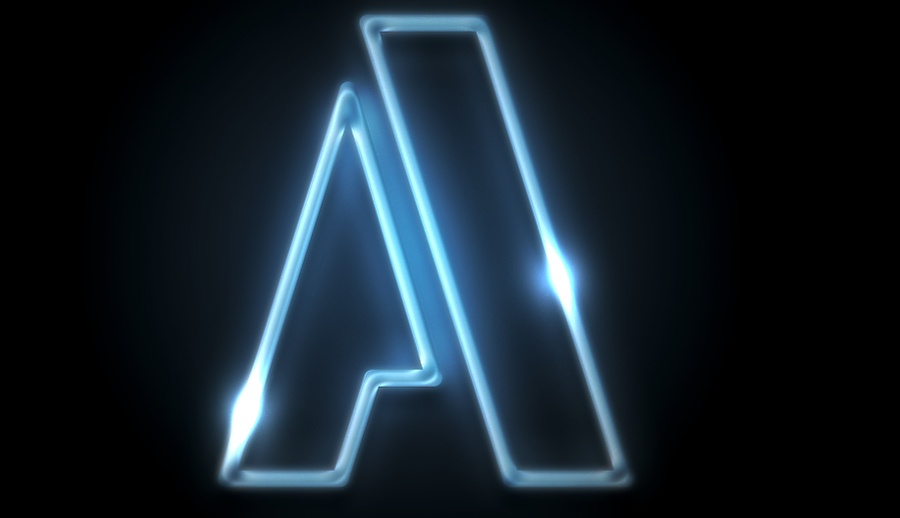
Conclusion
After a few steps this is the final animation. Using the timeline is quite simple if you compare the number of steps necessary to create the light effect. The cool thing is that Photoshop makes our lives much easier when it comes to create simple animations.

Download the Photoshop file
Click here to download the Photoshop file used for this tutorial.
You can view the entire tutorial here.