Complete exerciseand save as follows: 2013.10.4_Last Name_First Name_TypePalette
Homework | Week 5
Homework 1: Project I
Incorporate today’s critiques into your final project which is due Week 6 | Wednesday AT THE BEGINNING OF CLASS.
Homework 1: Project I
Your entire project should be finalized and drawn in Illustrator. Your front, back and spine designed and completed in color, all materials including your inspiration, research, .jpgs/.pngs, .ai files, your Word document and your final design saved as a PDF. Everything should be burned to your CD/DVD burned, all items placed in your CD/DVD case including writing your name, date and project title on the CD/DVD. Final project due on Week 6 AT THE BEGINNING OF CLASS.
Items That Must Be Physically Turned In On Week 6 at the START of class:
CD/DVD with your designs inserted into the case.
Adobe Illustrator Project I: Written Description, on your website, printed out and on the CD/DVD.
All .ai, .jpg and .doc files burned to a CD/DVD which should be inserted into the case.
Label your CD/DVD Date_Last name_First name_Illustrator Project 1
Homework 2: Complete the tutorials. Change the colors, strokes, etc. Personalize them. Upload them to BOTH Flickr and to your websites. Be sure to label each one.
LAYERLESS THINKING
LOCKING & HIDING
THE ALIGN PALETTE
PATHFINDER PALETTE
THE TYPE PALETTE
Homework 3: DELICIOUS
On your del.icio.us account tag three Web Sites that focus on todays class tutorials, and write a note in the Delicious comments section about why you think each one would be a good resource for this class. *Make sure you also add the tag: digitalmediaproductionramapo2013AS WELL AS add additional tags.
Break into groups of three, share your work, speak to its strengths and weaknesses. Take notes because your are required to post a review of BOTH of your classmates in your group to your website. Critiques should be posted by 10am on Saturday.
Design Development: Iterative Design Process
Explore: What are you trying to solve?
Functions: Define the usage, dimensions and output.
Iterate: Plan – Do – Study – Act
Agree on the objective.
Work on the design.
Using virtual prototype (sketches in your sketchbook), study the outcomes.
Make a decision and move from the sketchbook to Illustrator.
CREATING OBJECTS
Complete exerciseand save as follows: 2013.9.27_Last Name_First Name_CreatingObjects
Download line exercise file listed below and save them to your desktop.
Create a new print document in Illustrator: File > New > Print > Letter > Vertical > Selection Tool > Place > Select the image > Size it to fit the page > Click away from the image > Start with the Pen Tool and continue selecting the various tools.
Stroke size: 3 points.
Add a color to the stroke AND fill the images. Personalize your designs.
##Save ALL files as .ai files as well as .jpg and upload to your Flickr. Use the url code to insert it on your website homework blog posting, giving your document a name starting with: 2013.9.27_Last Name_First Name_Line Exercise 2 (etc.)
BEZIER CURVES
With Bezier curves you connect the dots to create an image. By simply connect the dots, you have straight lines. We’ll use Bezier curves to create smooth images which incluses curving lines.
Bezier curves simply employ a level of mathematical formulas to apply curves to your image data. When using the Bezier tools in Vector programs you manipulate your vector lines to create the curves. An Illustrator project is made up of a series of paths, (points called anchor points). Points are connected by curved or straight outlines called paths, and a curved path makes up a Bezier curve.
If you select the Pen Tool and click (and release) on the workspace, you create an initial anchor point. Click in another location (do not release) and drag to create a curved path (Bezier Curve). You’re able to select any anchor point at any time and drag to edit the look of the curve. When you click and drag anchor points, direction handles appear. The angle and length of these direction handles determine the shape and size of the curve. The direction handles in a Bezier curve are not part of the design and will disappear when the path is not active.
Complete exerciseand save as follows: 2013.9.27_Last Name_First Name_BezierTool
SELECTION TOOLS
Complete exerciseand save as follows: 2013.9.27_Last Name_First Name_SelectionTool
OBJECT ORIENTED DESIGN
Complete exerciseand save as follows: 2013.9.27_Last Name_First Name_ObjectOrientedDesign (Change the colors of the balls/sand/stroke, etc. Personalize it.)
GROUPING
Complete exerciseand save as follows: 2013.9.27_Last Name_First Name_GROUPING (Change the colors of the balls/sand/stroke, etc. Personalize it.)
REFERENCE:
For those of you who want to convert artwork or a photo into a vector artwork for your CD cover, view this video.
Homework 1: Vincent Van Gogh
Design Brief:
Choose one of the three paintings by Vincent van Gogh and re-create it in Illustrator.
This exercise will help you to begin understanding how design elements can work together to form a work of art. Your recreation doesn’t have to be an exact reproduction because we haven’t mastered all the tool. Use the elements of designs and the tools you’ve been learning so far.
Look for horizontal and vertical image blocks and show the motion simple shapes affect when creating a dynamic work of art. Keep note s of the techniques the original artist used in the work’s production and write a few sentences about the techniques and tools you used to recreate it.
The first thing you should do is to concentrate on the general shapes of the work, then move on to color, and then the final details. Try to interpret the design choices Vincent van Gogh made when he painted the image.
Deliverables:
A .jpg and .ai of your recreation
The original image along with a blog posting naming the artist and the name of the painting.
The image files should be named 2013.9.27_Last Name_First Name_VanGogh
Create a new document
Import the painting
Create a New Layer
Apply design elements use drawing tools such as the rectangle, oval, square, circle, etc. to begin tracing over the image.
Use layers to help organize your composition. (Each new element you wish to add, you can create a new layer and add it to that layer.) Name each of your layers.
Add color to your document.
Use the drawing tools to add as much detail as possible.
Hide the original painting by turning the visibility to the original layer (clicking the eyeball on the layers palette for Layer 1.
Save your file as an .ai file. You will need to Save for Web and Devices and change GIF to JPEG to save as a .jpg file. Set your image quality to high.
Finish and Save
Post the original artwork and your document to your site.
Homework 2: Bezier Curves
Watch the video below and recreate it in Illustrator. Save the file as an ai and jpg and upload to your Flickr and your website homework post, giving your document a name starting with: 2013.9.27_Last Name_First Name_BezierCurves
Homework 3: Complete all in class assignments if you you have not already done so and upload them to Flickr and then your website. When completing the exercises, use a different color so that I can see what you’ve created. Review the videos for reference.
Homework 4: Copy the following questions to your website and answer them:
When drawing with the Pen tool, how does creating the first point of a straight line differ from creating the first point of a curved line?
How do you import a bitmap image that you want to trace in Illustrator?
What key do you hold down on when you want to remove one shape from another using the Shape Builder tool?
What is the purpose of using Bezier curves? Why not simply draw these curves using the pencil tool? Provide a link as an example of an image created with a Bezier curve.
Homework 5: Use ILLUSTRATOR to create the first iterations for Project I. Use your sketches as references for your Illustrator files. Files should be created for the logo, front and back cover and spine. The following items should be included in your Illustrator files.
Product specifications required include:
Designed to the exact CD/DVD size using the template provided
Company or product name
Manufacturer
Font choices
Logo design
Bar code
Designed in color
Save your .ai files as well as export your files and save as .jpgs. Upload all your .jpgs to Flickr, copy the image URL, go to your website blog post, add media, insert URL, paste Flickr URL, click on link back to Flickr and save your post.
Homework 6: Critique
Post your critiques of BOTH of your classmates designs to you blog by 10am on Saturday. You are to take these critiques into consideration when creating your first design iteration using Illustrator. Then RESPOND to the critique. You don’t have to incorporate their critique into your design BUT you need to justify why you did or did not incorporate the changes.
Adobe Bridge is an organizational software application that is a part of the Adobe Creative Suite. Its primary purpose is to link the parts of the Creative Suite together using an interface similar to the file browser found in previous versions of Adobe Photoshop. It is accessible from all other components of the Creative Suite.
Best Practices for File Naming
Accurate file-naming – Special characters – Underscore – Date
Adobe introduced Illustrator 1.1 was introduced in 1987, using the Bezier curve as the basis for vector graphics. These vector graphics create PostScript files visually.
Adobe Illustrator vs Adobe Photoshop
They share much of the same functionality BUT Adobe Illustrator is used for creating vector graphics and vector text, while Photoshop is used to create raster graphics (or bitmaps). Vector graphics are made of lines and curves that contain mathematical objects called vectors (Illustrator). Raster graphics (or bitmaps) contain tiny dots of color (also called pixels or bits)(Photoshop). In Photoshop the image is the combination of many of these dots/pixels with the final result being the appearance of a solid image. You to edit images by changing the pattern of the pixels by lightening or darkening them, and by rearranging their pattern.
Summary: Photoshop is the primary tool for editing photos and Adobe Illustrator is the preferred tool for creating vector graphics. Note: Bitmap graphics (photos) are much larger in file size than vector graphics because information for every single bit must be saved to the file. Every time you change the file and resave it you lose quality. Change the size of a raster graphic and your quality will be changed. Vector graphics can be scaled to any size without losing quality.
Adobe Illustrator will allow you to convert a vector image to a raster image. You can also import raster images, but the images themselves cannot be edited in Illustrator.
See the example below of a vector and a bitmap below.
Understanding Vector Graphics (Illustrator)
Vector is another word for a scalable graphic design. They are constructed shapes, colors, and placement that together, form a picture, and are ‘scalable’. Vector graphic formats include PICT, EPS, and WMF as well as PostScript and TrueType fonts.
In their original format, vector graphics are easy to alter; anything about the graphic can be changed. Vector graphics allow you to open a previously saved file, change it, and then save it again. You can open the file an unlimited number of times, change it, and then save it and you never lose the integrity of the document. They offer exceptionally high quality print; the vector file type most typically requested by printing companies is called .EPS – which is short for Encapsulated Post Script.
Adobe Illustrator creates graphics in vector format, and then from these vector images a whole multitude of other file types can be created without changing the scalable attributes of the vector file (the master file). From this master file you can create a GIF, JPEG, PNG, TIFF, XBM, BMP, and PCX file. Note, you can take a vector file and turn it into a bitmap bile but you CANNOT take a bitmap image and turn it into a vector image.
When a shape or an object in Illustrator, it is considered either an open path or a closed path. When the path is enclosed, a square for example, it’s call that a closed path. When the beginning and ending points are not connected, a line for example, that is an open path. A path is made up of multiple segments with each segment having an anchor point at the beginning and one at the end. Anchor points control the shape of the path. When you draw a shape, it is considered to be an object in Illustrator. Anything added is always considered an object.
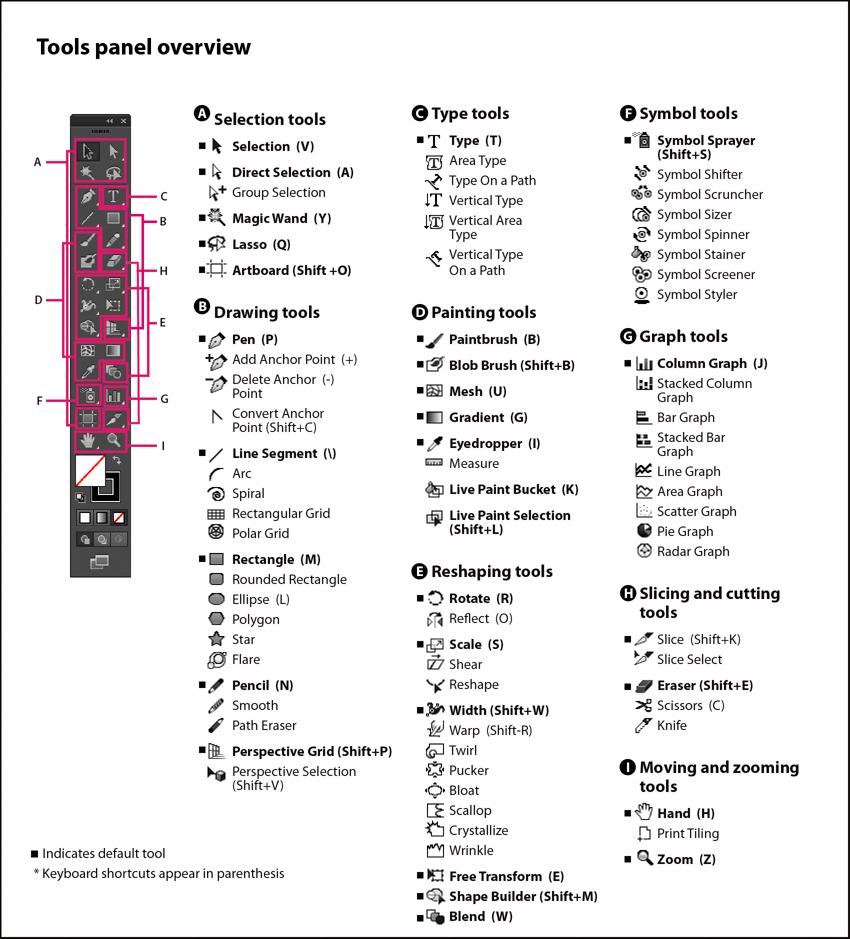
The Tools panel appears at the left side of the screen. You can move the Tools panel by dragging its title bar. You can also show or hide the Tools panel by choosing Window > Tools.
You use tools in the Tools panel to create, select, and manipulate objects in Illustrator. Some tools have options that appear when you double-click a tool. These include tools that let you use type, and select, paint, draw, sample, edit, and move images.
You can expand some tools to show hidden tools beneath them. A small triangle at the lower-right corner of the tool icon signals the presence of hidden tools. To see the name of a tool, position the pointer over it.
Setting Up a New Document
File – New
Choose a profile: print, web, video/film, etc.
Advanced: choose your color mode (CMYK for print, RGB for web)
Create an original graphic for a background for a website using Adobe Illustrator, to create an original work. Use design elements including line, shape and space as well as Illustrator effects to create the background.
Create a new document with the following parameters, prepped for the web:
Width: 1280 pixels – Height: 800 pixels.This is the most common web resolution.
Make sure that the New Document Profile has Web selected. This will set the resolution will be set for you (72 pixels/inch, color mode RGB 8 Bit).
Open the sample vector file and drag it and drop it onto your new document. Change the following: color, size, shape and placement and scale using Illustrator’s simple tools and effects (blur, etc.) to create a generic background that could be used for a website. Save the file as an editable pdf and upload to your blog.
Give your document a name starting with: 2013.9.20_Last Name_Frist Name_Background.
In Class Exercise 2:
Create a new document with the parameters above EXCEPT this time, DO NOT use the sample vector file. Create your own vector file. Save the file as an editable pdf and upload to your blog, giving your document a name starting with: 2013.9.20_Last Name_First Name_Background2
The project theme is: WATER.
IN-CLASS EXERCISE 3:
– The project theme is: RESIZING/TRANSFORMING.
Rectangle Tool
Create a new blank document. File > New (The shortcut on the Mac is Command+N)
Choose Print from the New Document Profile drop-down menu and Inches from the Units drop-down menu.
Profile > Custom – Number of Artboards > 1 – Size . Letter –
Press OK and a new document appears
Select the Rectangle tool from the Tools panel. Click and drag anywhere on the artboard. Typically, you pull from the upper-left corner diagonally to the lower-right corner.
Save the document as: 2013.9.20_Last Name_First Name_Rectangle
Complete the following:
Choose the selection tool and click on your rectangle to highlight the rectangle and show the eight handles.
Drag the rectangle to a new location without resizing it.
Hover over the bottom-middle handle until the cursor becomes a vertical arrow. Click and drag to resize the rectangle.
You now know how to create, move and resize and object.
Save the document as: 2013.9.20_Last Name_First Name_Rectangle2
Transform Panel: The transform panel lets you know the shape’s dimensions.
Select the rectangle – Open the Transform panel – Window > Transform
Click on the upper-left corner of the reference point locator to see the X and Y values change
Choose View > Show Rulers to display the rulers
In the transform panel type 2 into the X text field and 2 into the Y tab field. MAKE SURE the Constrain Width is not selected. Then type 1 in Width and 1 in Height text field.
The rectangle is now positioned and sized according to those values.
Save the document as: 2013.9.20_Last Name_First Name_Rectangle3
Rotating and Using the Transform Panel:
Select the shape – Type 25 into the Rotate text field at the bottom of the Transform panel and hit REturn. The object rotate 25 degrees counterclockwise.
Click and hold on the arrow to the right of the Sheer text field and choose -30 from the drop-down menu. The shape is now sheared by 30 degrees.
Save the document as: 2013.9.20_Last Name_First Name_Rectangle4
Constraining a Shape:
Select the Rectangle Tool
Hold down the Shift key and click and drag on an empty are. NOTE: Holding down the shift key contrains the shape to create a square. To keep it a square, release the mouse BEFORE releasing the shift key.
Do the same with the Elipse Tool. You can find the Elipse Tool by holding down the mouse on the Rectangle Tool and you’ll see a drop down menu.
Hold down the Shift key, select an area of the art board, and drag to create a circle. NOTE: Remember to release the mouse BEFORE you release the Shift key to keep the shape a circle.
Save the document as: 2013.9.20_Last Name_First Name_Rectangle5
@@@NOTE: At the end of the Illustrator section you will be turning in a print portfolio with all your work. Create a NEW Illustrator document and place ALL your rectangles on ONE page.
Save the document as: 2013.9.20_Last Name_First Name_RectangleFINAL – Upload that file to Flickr and post on your website. @@@
IN-CLASS EXERCISE 4:
– The project theme is: SHAPES.
Download the .ai file here that will be used in exercise 1. For this simple exercise you will do the following:
Recreate the shapes that are locked on the layer base. DO NOT unlock the layer.
Change the width of the stroke of each of the shapes.
Save the file as: 2013.9.20_Last Name_First Name_Exercise_Shapes – Upload that file to Flickr and post on your website.
Entering Exact Dimensions:
Choose Illustrator > Preferences > Units to see the Preferences box. Select inches from the General drop-down menu.
Using the Ellipse tol, click on the artboard.
Type 4 into the Width text field and press the Tab key. Type 4 into the Height key and press OK.
Under the Ellipse tool in the TOOLS panel are a number of other shape tools. Try the Star tool next.
Save the document as: 2013.9.20_Last Name_First Name_Shapes – Upload that file to Flickr and post on your website.
Save the document as: 2013.9.20_Last Name_First Name_Glass – Upload that file to Flickr and post on your website.
MAJOR PROJECT 1
(Illustrator CS 6): CD/DVD
The assignment is to create a digital still life (a CD/DVD design including front, back and spine), in Illustrator, using your knowledge of the drawing tools. The designs will be set up and must be sketched BEFORE moving to Illustrator.
Design Brief for Illustrator
CD/DVD Case Design
Develop a design for a compact disc CD/DVD case. This design will include both the front and back cover insert for a conventional jewel CD/DVD case, along with the title panels. The design can focus on either an audio CD/DVD or CD/DVD game, CD/DVD movie title, or idea of your own and can be either real or fictitious.
This gives you the layout for the front and back but not the spine.
CD/DVD Name: Use a real or fictitious audio CD name – or real or fictitious CD or DVD game title.
Logo: Design an original logo for the company of manufacture for either the audio CD or game CD/DVD.
Information: The project will include all of the information typically found on either an audio or game compact disc. Included will be the side title bars and the back cover insert. Dimensions can be found on a typical CD case or DVD cover.
Project specifications include research, size, name, manufacturer, font choices, initial logo design and initial box design and final designs.
Written Description: Detailed 500 word document detailing your design process, the tools you used and what you would change if you had to do it again.
* Each project must be submitted with following items: Research & Conceptual Sketches, Preliminary Comps, Final Designs and written description. You will be graded separately on each phase of your projects. You will also be submitting each final design as a digital file.
Final Package Printout:
Final project must be printed in color, at full size, and inserted into a cd/dvd case. The cd/dvd inside the case should ALL files you created (including hand sketches, multiple .ai iterations and written description doc. All files should also be uploaded to your website on a page titled PROJECT 1 | Illustrator. KEEP ALL ORIGINAL FILES. They will be turned in at the end of the semester on a DVD.
HOMEWORK | Week 3
A NOTE ON SKETCHING
When designing anything, (including the CD/DVD project) sketch often!
Sketching helps you think about content, hierarchy and flow among other aspects. Sketches are cheap, easy to do and very fast. You should be able to create one new idea every thirty seconds. Sketching is also one of the best ways to communicate ideas about layout, user experience and user flow for a site.
DON’T use the computer until we review the sketches in class. Young designers tend to skimp on the sketches or omit them altogether. Too many designers transition too early from sketches to a higher fidelity design without first exploring all possible solutions.
Sketches allow you to iterate on ideas quickly and save lots of time experimenting in mockups or code
Create a NEW page call Illustrator Project 1. The parent page should be Digital Media Production. On the Illustrator Project 1, heading: Sketches. Under that, create a list:
Logo Iteration 1
Logo Iteration 2
Logo Iteration 3
Cover Iteration 1
Cover Iteration 2
Cover Iteration 3
Back Cover Iteration 1
Back Cover Iteration 2
Back Cover Iteration 3
Spine Iteration 1
Spine Iteration 2
Spine Iteration 3
The sketches from the instructions below need to be uploaded to Flickr and the URL linked to each one of the above.
Create CD/DVDwith various iterations in your sketch book. Scan your drawings OR take a photo and upload to Flickr, then link the URL to the above.
Create Logo for CD/DVD with various iterations in your sketch book. Scan your drawings OR take a photo and upload to Flickr, then link the URL to the above.
Finish ALL in-class exercises, create a new blog posting title: Week 3 | Homework.
Take the website background that you created in class, the one with the circle, and refine it. Do some research on color palates, website backgrounds and framing website and update your design. Scan your drawings OR take a photo and upload to Flickr, then link the URL when you go to WordPress – add media – insert url.
Open the attached .ai file here. You’ll see a completed fish illustration on the top and the individual components of that fish at the bottom.
Choose the Selection tool – Click on the large red fin.
Click and drag to reposition the fin anywhere on the page.
Choose the Direct Selection tool from the Tools panel.
Reposition the cursor over on of the tips of the fin and click when you see the arrow with the small white square.
Click on the solid anchor point and change the shape of the fine. (this shows you how to alter the shape). Hit Command Z to undo that.
Grouping the Scales:
Click the Selection tool – Click on one of the orange scales – hold down the Shift key and click on a second scale. Now two scales are selected.
Choose Object > Group or Command+G and the two scales are grouped together.
Shift+click a third scale to add to the selection. Select all the scales.
Press Command+G to group all six scales.
Choose Select> Deselect or Shit+Command+A to deselect the scales.
Using the Selection tool, click on one of the first scales you selected.
With all the scales selected, click and drag the scales on toop of the fish’s orange body.
Click on the Selection tool to reposition the rest of the separate components together to complete the fish.
Choose File > Save As and save it with the following file name: 2013.9.13_Last Name_First Name_Exercise_Fish
Choose Illustrator > Preferences > Units and change the measurement units in the General drop-down menu to Inches. Press OK.
Choose File > Save As and save it with the following file name: 2013.9.20_Last Name_First Name_Exercise_Fish2
Using the Transform Tools
Click on the Star tool and select the Rounded rectangle tool.
Click and drag to crate a rectangle with rounded corners of any size.
Activate the selection tool and click and drag until the rounded rectangle fits the dimensions of the guides located in the center of the document.
Adding a Fill Color
Now fill the rounded rectangle with a color.
Select the rounded rectangle with the Selection tool
Locate the Control panel at the top of your workspace and click on the Fill box. Color swatch appear.
Select the color CMYK Blue
Modifying a Shape
Select the Polygon tool and click on the artboard.
Type 3 into the Sides text field and press ok.
Choose the Selection tool and click and drag the top center anchor of the bounding box upward to stretch the triangle.
Click and drag each corner of the shape to resize the shape.
Entering a Shape Size in the Transform Panel
Choose Windows > Transform
Select the triangle and type .5 in the W and 2 into the H and Return
Press D – the triangle’s color reverts to the default white fill and black stroke.
Click one on the Stroke box and select None.
The triangle is not visible now. You can only see its anchor points.
Viewing in Outline View
Use the Selection tool and click on the artboard to deselect the triangle.
Choose View > Outline.
Use the Selection tool and click on one of the triangle’s sides and reposition it so its tip touches the center of the rectangle.
Choose View > Preview.
Rotating the Shape
Let’s create a series of triangle shapes and rotate them 360 degrees.
Select the triangle. and select the Rotate tool.
Option+click the tip of the triangle. Type in 18 into the Angle text field and press Copy. This rotates your triangle 18 degrees.
Press Command+D to repeat the transformation.
Continue to press Command+D until you reach the original triangle.
Press Command+Y to return to Preview view.
Changing the Color of the Triangles
Now we’ll select the triangles and change their opacity.
Switch to the Selectiion tool and select one of the white triangles.
Choose Select > Same > Fill Color and all the white triangles become selected.
Choose Object > Group
Type 50 into the Opacity text field and return
Choose File and save as follows: 2013.9.20_Last Name_First Name_Triangle
DELICIOUS: On your del.icio.us account tag three Web Sites that focus on Adobe Bridge, Illustrator or anything we learned in class today, and write a note in the Delicious comments section about why you think each one would be a good resource for this class. *Make sure you also add the tag: digitalmediaproductionramapo2013AS WELL AS add additional tags.
Registeras a user of this blog. Post a comment to this blog post to let me know that you are registered and include the address (url) for your ”wordpress blog”. Each week following this you will post a link to your homework on your own WordPress blog in the comments section of this blog.
Go to WordPressand create a blog that you will use to house your homework for this class. Under appearances, select themes and choose a new theme. Add widgets, fill out the personal info on the blog and create a blog that shows some personality. Add the Delicious and Flickr widgets.
Create a del.icio.us account for yourself. Tag three Web Sites that focus on WordPress tutorials (example: how to create a WordPress post, how to change and manipulate and/or change a WordPress theme, etc.) and write a note in Delicious about why you think each one would be a good resource for this class. *Make sure you also add the tag: digitalmediaproductionramapo2013 as well as other relevant tags.
Create a Gravataraccount. Take a photo of yourself, upload it to Gravatar and link it to your WordPress blog using the email you used to create the blog.
You are required to purchase a domain name and web hosting space for this class. This is where you will post and maintain all of your work for the semester. My recommended hosting company is Bluehost but you may purchasing hosting space anywhere you choose. The domain name should be your first name, last name .com. Example: www.maryjones.com Make sure you obtain a domain name and web hosting account by the next class. Bring in the username and password for your account.
You will need access to the Adobe Creative Suite for homework assignments. You can come in to use the school computers or you can purchase Adobe Creative Cloud for $19.99/month (student discount).
Week 2 – September 9th
Student Websites
Wp-Admin Panel
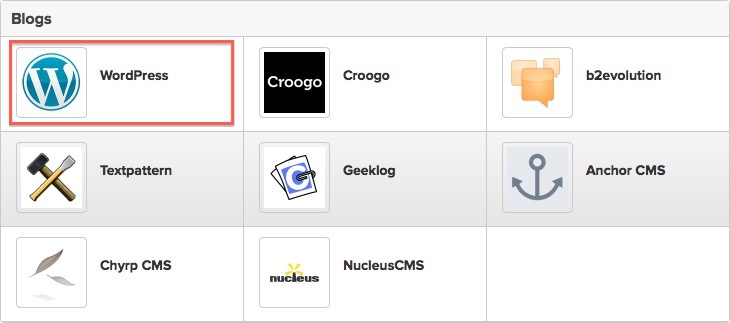
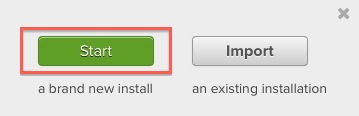
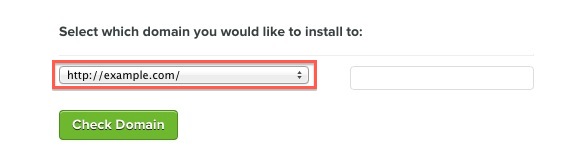
Installing WordPress
Selecting Themes
Adding Pages
Creating Posts
Adding Media
What is WordPress
WordPress is an open source CMS (content management system), often used as a blog publishing application powered by PHP and MySQL. It has many features including a plugin architecture and a templating system. Used by over 12% of the 70,000,000 biggest websites, WordPress is the most popular CMS in use today.
Once installed, WordPress allows you to manage content, pages, media, create menus, etc. Generally, it gives you power to take control of your website without your web administrator’s help.
This 5-minute video provides a brief introduction to the WordPress content management system and demonstrates why it is the most popular web publishing platform today.
Covered in this video:
Brief history of WordPress.
Why it’s much more than a blogging tool.
The power of “Open Source.”
How WordPress works.
Six reasons to choose WordPress.
Why Choose WordPress?
Free
Open Source: Easy to find, easy to use, easy to share
Findability is the end goal for any website. If a tree falls in the forest and no one saw it fall, did it really fall?
If you want to get indexed on Google, WordPress is a great way to do it. WordPress is built to be a magnet for search engines and other online indexes to the extent that if you don’t want your WordPress site indexed, you have to take steps to prevent it from happening.
WordPress has great search and share optimization. Plugins like WordPress SEO, AddThis, and Facebook for WordPress give any site the opportunity to be seen.
WordPress is easily findable, accessible, and provides shareable information. When reading or viewing content on a WordPress site, you are able to access and interact with that content through comments and RSS feeds.
Mature
Customizable: Easy to publish, easy to configure, easy to maintain
WordPress is at the pinacle of open source. It is built, evolved, and maintained by the people that use it and is in a constant state of forward-moving change. .
WordPress has undergone several fundamental changes that have made applications even easier to use and has become more powerful and diverse.
Easy to Maintain: Easy to build, easy to augment, easy to evolve
With the advent of themes, building a custom WordPress site from scratch takes less time than with any other platform. WordPress is a simple interface between the site owner, the database, and the end user.
Large Community
The Bottom Line
WordPress offers one of the best available solutions for most websites today. It’s a great tool to use and has both the ease of use and the advanced features to suit pretty much any need. And just when you think your need isn’t met, a theme, a plugin, or an extension is there to fill the void.
WordPress.com vs WordPress.org
WordPress.org is where you can download the latest version of WordPress for installationon your own domain. It is also where you can find documentation and support, and add-ons to customize your site.
WordPress.com is where you can set up a blog under the wordpress.com domain (yourblog.wordpress.com). The basic service is free and supported by advertising, premium services like your own domain name are available for a fee.
Sample Sites
Some people think they don’t want to use a system like WordPress because they don’t want there site to look like a “template” or a “blog”. Basic WordPress sites do share similar layouts but there are thousands of free and commercial themes that you can use and, if you want to get into more advanced techniques, completely customize. Here are some examples of sites that were built with WordPress:
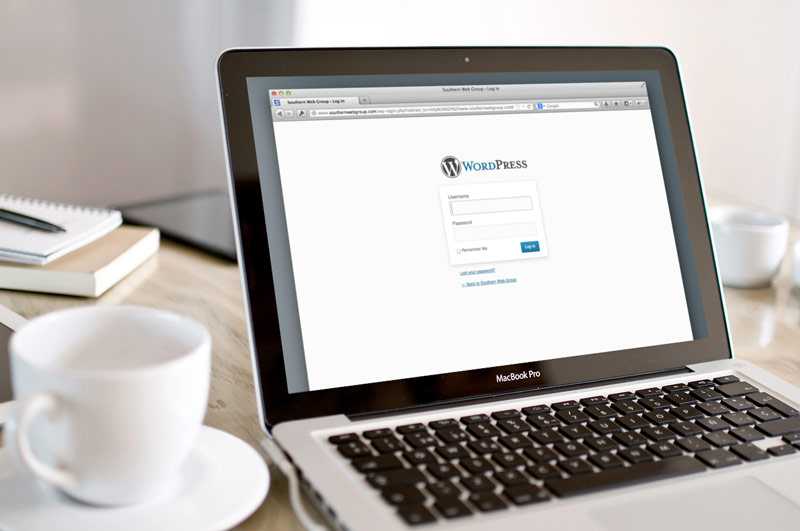
When you installed WordPress through the one-click install on Mojo, they gave you a username and password. Use that to login to your WordPress admin panel.
If you are successful, you will see a screen similar to the one below:
The Dashboard
This video provides an overview of the WordPress Administration Panel which provides access to the functions and features of your WordPress-powered website.
Covered in this video:
Familiarizing yourself with the WordPress Dashboard.
How to customize the WordPress interface just for you.
Hide Dashboard modules you rarely use.
The collapsible navigation menu and functions.
The default modules that are available to users.
How to use the QuickPress module to quickly create a new Post.
WordPress themes control the aesthetic design of your website. This includes more than just color, but also fonts, layouts, columns, and much more. When you first installed WordPress, it installed the default WordPress theme. There are all types of themes available and hundreds, if not thousands, of free themes as well. Many themes are developed for specific types of businesses or personal websites and you can search through those themes in your dashboard.
There are many places where WordPress themes are available. You can find many themes at the official WordPress site, inside your WordPress Dashboard, and many other third parties as well. Some themes are free, other themes from private third parties may charge money, and some themes are free but require you to carry their copyright information.
WordPress, out of the box, doesn’t look ‘pretty.’ The front of your WordPress site, when first installed, is basic, simple, and rather boring.
WordPress’ Twenty-Twelve Theme
That’s because the theme that comes pre-installed with WordPress is very basic, simple, and boring. It’s a RESPONSIVE THEME. Responsive Themes have a flexible foundation with fluid grid system that adapts your website to mobile devices and the desktop or any other viewing environment. This theme is still pretty plain. That’s the theme of the theme: simple. It’s meant to be uncomplicated.
But that’s not really how we want our site to be, right? We want colors, and cool tricks, and we want to stand out!
WordPress allows you change your theme. You can choose something like this:
Portfolio Theme from theThemeFoundry.com
Or this:
Custom WordPress theme for annasbay.org
But the backend of your website, the place that gives you the most power, still looks like this:
Out of the box WordPress Dashboard
The Beauty of WordPress Themes
WordPress themes change the aesthetic look of your website, the theme of your website, without changing the core functionality of WordPress.
Choose a theme PRIOR to installing content on your website! Each these looks an acts differently so settle on a theme FIRST.
In summary: themes dictate the way that your WordPress website looks. You can consider it the skin of your site, or the look and feel of your site, it’s the eye-candy that you hope website visitors ooh and ahh about.
Changing your layout: Finding a new WordPress Theme
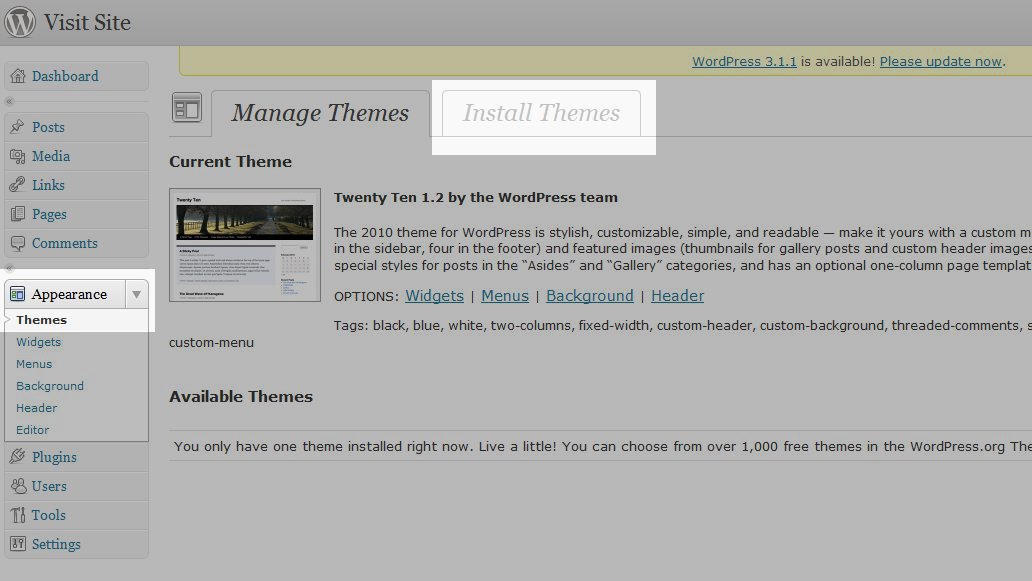
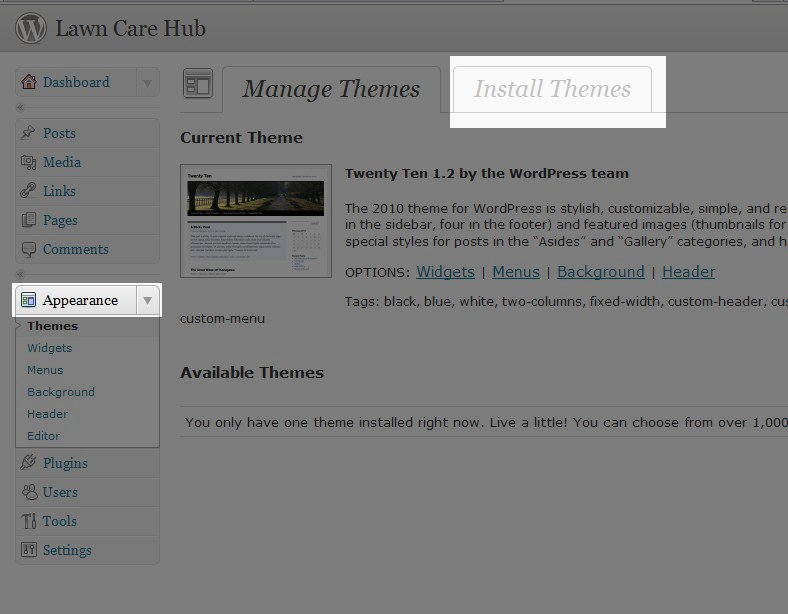
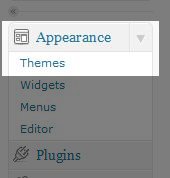
WordPress has thousands of themes readily available to be installed directly from your WordPress Dashboard. You will need to login to your Dashboard. Once you have logged in, select “Appearance” on the left menu and the “Themes” page will automatically load. Click on the “Install Themes” tab to find a new theme.
What different Themes are available?
There are a few different ways to find a new theme on the Install Themes tab. Click on the “Featured” and “Newest” links as this will show you some of the most popular and up to date themes available.
If you click on the “Featured” link a page similar to this one will load that will allow you to look at different themes that WordPress is featuring.
How do I search for a Theme?
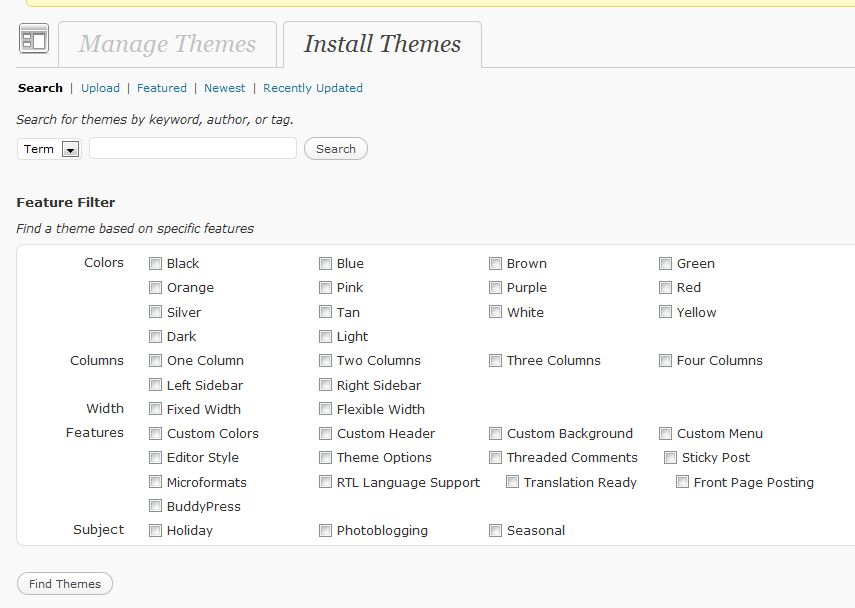
On the “Search” link you will be able to search for themes using terms or by selecting the features you want the theme to have:
How you search depends on what is important to you. Do you need a dark color? Two columns? Columns that have Flexible Widths (meaning you can easily change the width of your website)? You can try different combinations of searches to find the theme that is just right for you. Sometimes with the search option in WordPress it is hard to find the exact theme you are looking for, so if it does not find the theme you had in mind you can also scroll through the themes available in the “Featured” and “Newest” links we mentioned above.
Installing a new theme in the WordPress Dashboard
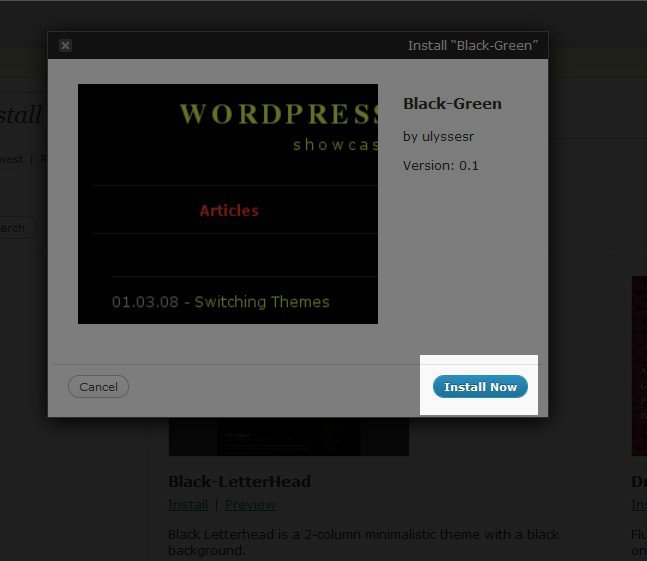
Log into your WordPress Dashboard, click on Appearance and then themes. Once you find the theme that you want to install, click the “Install” button link under the theme and the pop-up box below will appear.
Click on the “Install Now” button, and a page will load that confirms that the theme has been installed.
Go back to the “Manage Themes” tab, the theme you just installed will be available to use.
Click on “Activate” under the new theme, and that theme will now be the one used on your website.
Finding a new theme online
While WordPress comes with hundreds of themes available to be automatically installed through the Dashboard, you may not be able to find one that meets your needs perfectly. With thousands of themes available online, to help you get started below I’ve outlined how to find more WordPress themes online.
What types of themes are available online?
There are two main types of themes available fro you to use: free and paid. Look into the free themes first since there’s no point in paying for a theme if you can find a free one that you like. Many free themes will have a line at the bottom of your theme giving credit to the person that made it, but beyond that you can fully customize them. If you purchase a theme, some sites will sell a theme by itself while at other sites you will pay a yearly fee to have full access to their themes.
Where do I find themes online?
Many websites offer WordPress themes and a simple Google search returns millions of links to websites for WordPress themes . To help you get started, below I’veoutlined some of the more popular theme sites. Themes commonly used by WordPress users:
Once you have downloaded the theme you want to use, you will need to install the theme. Most themes will contain documentation on how to manually install the theme and any plugins the theme may require you to install.
Installing a WordPress Theme from the Internet
Any theme you find online can easily be installed using your WordPress dashboard. You will need to download the theme to your local computer, usually a compressed zip file, and then proceed to upload it.
Installing a Theme Manually in WordPress
Download the theme from the internet. Once you have downloaded the compressed file, in the WordPress dashboard, click on “Appearance” which will bring you to the “Themes” page.
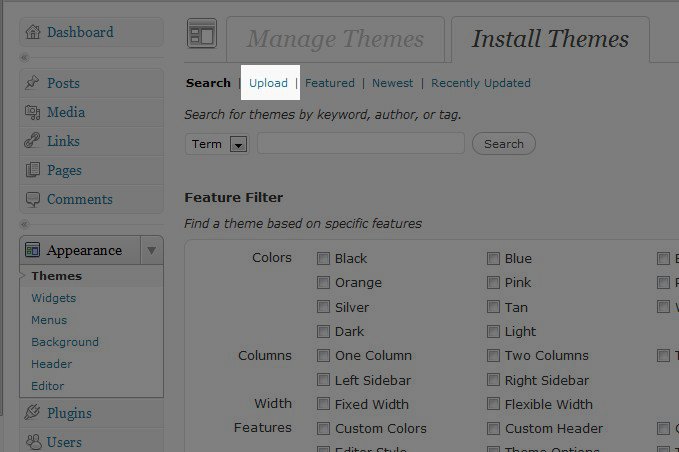
Click on “Install Themes“, them proceed to click “Upload”
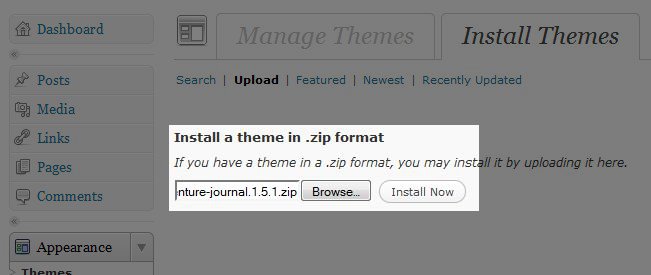
Click on the “Browse” button and find the file you saved on your computer. Once you have located the zip file, click “Open” and then “Install Now”
Your new theme may take a few minutes to upload. Once the upload process is complete you will see the following screen. You can now preview how the theme will appear on your website.
Click “Preview” to preview how your website will look with the new theme.
Once you determine if you like how your website look, click “Activate” under the theme and this will enable the theme to publish to your website.
Your website it now using your new theme! You can now visit your website in the browser and make sure the theme displays properly.
Changing Your WordPress Theme
You can change your WordPress theme, you can. It’s a simple process done through your WordPress dashboard.
To change the theme, you will need to log into your WordPress Dashboard. Once you are logged in, select “appearance” on the left menu pane.
Be sure to click on the Manage Themes tab. It will automatically display.
You can change to any theme you may have installed by simply clicking on the “activate” button. Selecting a new theme will not affect your content BUT it can impact whether widgets and plugins functions. Once you have changed your theme, it’s wise to visit your website in a web browser and test it to make sure it is functioning correctly. If it is not, you may need to disable some plugins or widgets that may not be supported.
(WordPress Plugin) Plugins are pieces of code created with the purpose of expanding the functionalities of a software, in this case of WordPress. There are literally thousands of WordPress plugins already created, solving a wide range of problems and needs.
They are third party pieces of software you are able to install and use on your WordPress website. Plugins are typically developed to add additional functionality to your website that is not included in the standard installation of WordPress. Some examples of plugins are image galleries, contact forms, and banner rotators.
What are Widgets?
Widgets provide a way to arrange your sidebar content without having to alter your actual code of your website. Widgets can be a calendar, search bar, or many other types as well.
Searching for & Installing Plugins
One of the best features of WordPress is the ability to customize your website with Plugins. Plugins are easily downloaded and installed and within minutes. You can easily add customized functionality to your website.
Login to your WordPress Dashboard. Once logged in, click “Add New” under “Plugins”
Search for a plugin using the search feature.
If you wish to use the plugin after reading about it, click on “Install Now”
After the plugin has been successfully installed, you will need to click “activate plugin” to begin using it. To change the settings of your plugin, click on the “Settings” menu option on the left hand side to access the settings for your new plugin.
Updating a WordPress Plugin
Plugins like any other piece of software need to be updated from time to time. When a new version of the plugin is released you may need to update the plugin. Most plugins are updated to patch a security risk, or to add more features to the plugin. It is important to keep your plugins up to date for security purposes.
How do I know if a plugin needs to be updated?
Log into your WordPress Dashboard and select the plugins menu option. If you have a Plugin that needs to be updated, the plugins menu will have a number next to it.
On the Plugins page, you will see a message letting you know there is a new version available.
Click on the “update automatically” link, and it will lead you to a page to automatically install the update for that plugin.
Recommended Plugins for WordPress
Here is a list of some basic WordPress plugins to help you get started. There’s hundred more available but here are three you may want to use:
WP Super Cache – This is a caching plugin for WordPress. One of the main issues we see with WordPress sites is that if caching is not enabled, it causes some sites to load slower and use more resources. It is highly recommended to install Super Cache to help prevent these issues.
W3 Total Cache – This is an even more advanced caching plugin for WordPress. It’s recommended to use this caching plugin if you’re having issues with a large amount of 404 errors on your WordPress site.
Limit Login Attempts – This is a plugin that will limit the number of failed login attempts allowed, and will temporarily ban the IP address from trying anymore login attempts.
Captcha – This is a CAPTCHA plugin that operates by asking simple math questions to prove a human is filling out a form instead of a spam bot.
Google XML Sitemaps – To help your Search Engine Optimization and increase your visibility to customers, it is recommended you use the official Google XML Sitemaps widget. This will create a sitemap for your website which search engines look for when they crawl your site.
Akismet – This is a plugin that will help block spam from being posted in your Comments section.
Finding and Installing Widgets in WordPress
Widgets add functionality to the sidebar of your WordPress website. Follow the steps below to add new widgets to your website.
1. First, login to your WordPress dashboard. After you have logged in, click “Widgets” under “Appearance”
This screen contains three areas of interest:
Available Widgets
Inactive Widgets
Primary Widget Area
How to activate Widgets
Widgets that are listed in the Primary Widget Area are widgets on your website the you are currently using. To use another widget, simply drag the widget you want to use from the Available or Inactive list to the Primary Widget Area. Your theme may contain multiple areas that use widgets. If this is the case, you can add widgets into the Secondary, First Footer, and Second Footer areas.
Changing the Order in which Widgets Appear
Widgets load in the order in which they are listed in the sections. If you wish to change the order of the widgets simply drag the widgets under “Primary Widget” to the order you wish to have them display.
How to use the WordPress Text Widget
The WordPress Text widget is the easiest way to add custom HTML code to your WordPress sidebar.
In this article, I’ll show you how to add an “About us” section to your sidebar.
Find the “Text” widget under the “Available Widgets” section, and drag and drop it to your “Main Sidebar” section.
A window will appear in which you can type in a title and text for your widget. Enter your text, and then click “Save” and then click “Close”.
Your widget is now saved and is visible on your website!
Customizing your WordPress Sidebar
How to add images and image links to your WordPress sidebar
Written by Scott MitchellViews: 515Published: Jan 25, 2013
The sidebar is a wonderful piece of real estate on your site to place relevant content that may not fit directly on a page or post. Most content in a sidebar is text, however you can certainly add some diversity by making some of those text links into buttons or image links. Adding an image link to your WordPress sidebar is not much different than adding any other meta data. Below is a quick tutorial on how to add image links to your sidebar in your WordPress site.
Adding image links to your sidebar in WordPress
Log into your WordPress Admin dashboard.
Once logged into the Admin area, look to the left hand menu and click on the Appearance menu category. From there, click on the Editor sub-option to continue.
This brings you to the main Editor page for all php and css files for your current theme. Look to the menu on the right-hand side and scroll down until you see the Sidebar option. Click on that link to open the sidebar.php file in the editor.
select editor menu option
With the sidebar.php file open in the editor, you can edit the code and add your image. The snippet of code below is an image link that points to the XML reference site. Notice the tag uses the URL of an image on the test site. This is an image that was uploaded to the hosting account, which you can do either with the cPanel File Manager or by FTP. You can also point it to a location on another site if they allow you to do so.
Adding image link code to file
Once you have entered the code and ensured your image is in the right location, click on the Update File button to save the change and activate the code. Below is a shot of the test site with the XML image link pointing to the XMP site.
image sample after adding
WEEK 2 HOMEWORK
Install WordPress on your web hosting space. Each week you will post a link to your homework on your own WordPress website in the comments section of this blog.
Go to your DASHBOARD and install a theme (you may not use the default theme) under appearances, select themes and choose a new theme.
Fill out the personal info on the site in the SETTINGS on the dashboard.
Add the following PAGES to your website:
About
Contact
Ramapo College
Digital Media Production
Create additional PAGES for the other class your taking this semester
On the ABOUT page, add a photo of yourself, an artist statement and a bio. Have the image ALIGN LEFT. You should UPLOAD your headshot onto Flickr and insert it into your ABOUT page using INSERT URL. When upload your photo to Flickr, change the title and description, create a set, upload to photostream. Click on the photo you want to use, shift click and select view original image, choose the size you want the image to be, shift click on the image ad COPY image URL.
On the CONTACT page, add a contact plugin form. Try searching for Contact Form 7 in PLUGINS under POPULAR.
ON the RAMAPO COLLEGE page create a list of all your RAMAPO fall 2013 classes.
On the DIGITAL MEDIA DESIGN page, create a list with the following information:
Week 1 Homework | Due 9.13.13
Week 2 Homework | Due 9.20.13
Week 3 Homework | Due 9.27.13
Week 4 Homework
Week 5 Homework
Week 6 Homework
Week 7 Homework
Week 8 Homework
Create a POST called WEEK 1 HOMEWORK | Due 9.13.13
On that post write links to all your homework. Copy the URL. Go to the page you created called DIGITAL MEDIA PRODUCTION. Highlight Week1 Homework, click link and paste in the blog URL.
Create a POST called WEEK 2 HOMEWORK | Due 9.20.13
On that post write links to all your homework. Copy the URL. Go to the page you created called DIGITAL MEDIA PRODUCTION. Highlight Week 2 Homework, click link and paste in the blog URL.
List the Theme you added to your site
List the PLUGINS you added to your site (Add at least SIX plugins).
List any widgets you added
Website URL
List your Delicious url
On your del.icio.us account tag three Web Sites that focus on WordPress, WordPress themes, plugins, widgets or anything we learned in class today, and write a note in the Delicious comments section about why you think each one would be a good resource for this class. ALSO, add week 2 in your comments section so that I can keep track of your comments. *Make sure you also add the tag: digitalmediaproductionramapo2013 AS WELL AS add additional tags.
“In the Future Everyone will be famous for 15 minutes” -Andy Warhol 1968
“On the Web, everyone will be famous to fifteen people” -David Weinberger* 2002
A Vision of Students Today
Photo Booth
Go to PhotoBooth on your Mac and take a photos of yourself. Lean in close to the camera so that the photo shows a close up of your face. Once this is completed, please create a gravatar so that your image will be posted with each of your comments on the class blog. It will ask you to sign up for a WordPress account. Use your Ramapo email and use your first and last name as your username.
Your Personal Blog
You will post all homework on your personal blog. This is a blog you create specifically for this class. Go to WordPress and create your blog. For your blog address as well as your username, use your full name. Example, johnbrown.wordpress.com. It’s as easy as that! Please take note of the address now!
You will be required to post all your homework on your personal blog before the start of each class. When you log into the CLASS BLOG for each class, write the url of your homework that you created on your PERSONAL BLOG.
The Class Blog
This is the class blog. All lessons, homework, readings, and resources for the class will be posted through this blog. All of you will be required to register on the blog, and I will use the email address that you sign up with to communicate with you outside of the class. I will also place comments to your work on this blog. Please take note of the address now! Bookmark the url in Del.icio.us.
You will be required to log into the class blog each class. Please create a gravatar so that your image will be posted with each of your comments.
Student Questionnaire
Fill out the student questionnaire so that I have your contact information and can get to know you a little better.
Del.icio.us
Del.icio.us is a social bookmarking service that everyone is required to sign up for an account for an maintain tags on it. Through del.icio.us you are going to “tag” pages related to our work in the class so that you can reference them later and share them with the class. It is a way to keep all your tagged pages in an orderly manner making it very easy for you to find your tagged pages. We will be using Del.icio.us to tag sites related to this class including tutorials, design inspirations, lectures and other articles.
Everything you tag for this class must also include the following tag: digitalmediaproductionramapo2013 as well as additional and relevant tags.
Flickr is a photo sharing service that everyone is required to sign up for an account for and upload your weekly work too. Through Flickr you are going to “upload” images related to our work in the class so that you can reference them later and share them with the class. It is a way to keep all your work in an orderly manner making it very easy for you to find your tagged images.
Everything you tag for this class must also include the following tag: digitalmediaproductionramapo2013
Registeras a user of this blog. Post a comment to this blog post to let me know that you are registered and include the address (url) for your ”wordpress blog”. Each week following this you will post a link to your homework on your own WordPress blog in the comments section of this blog.
Go to WordPressand create a blog that you will use to house your homework for this class. Under appearances, select themes and choose a new theme. Add widgets, fill out the personal info on the blog and create a blog that shows some personality. Add the Delicious and Flickr widgets.
Create a del.icio.us account for yourself. Tag three Web Sites that focus on WordPress tutorials (example: how to create a WordPress post, how to change and manipulate and/or change a WordPress theme, etc.) and write a note in Delicious about why you think each one would be a good resource for this class. *Make sure you also add the tag: digitalmediaproductionramapo2013 as well as other relevant tags.
Create a Gravataraccount. Take a photo of yourself, upload it to Gravatar and link it to your WordPress blog using the email you used to create the blog.
You are required to purchase a domain name and web hosting space for this class. This is where you will post and maintain all of your work for the semester. My recommended hosting company is Bluehost but you may purchasing hosting space anywhere you choose. The domain name should be your first name, last name .com. Example: www.maryjones.com Make sure you obtain a domain name and web hosting account by the next class. Bring in the username and password for your account.
You will need access to the Adobe Creative Suite for homework assignments. You can come in to use the school computers or you can purchase Adobe Creative Cloud for $19.99/month (student discount).


